 |  |  |
|---|---|---|
 |  |  |
 |  |  |
 |  |  |
 |  |  |
 |  |  |
 |  |  |
Little Pig Soft Toy Pattern

COPYRIGHT 2014
The content and/or images from this page are to be used for a personal nature only.
Items created from the Free 'Little Pig' Pattern & Tutorial are not to be mass produced and sold for personal gain in any way.
Piggy Facts
The 'Three Little Pigs' is one of the best known fairytales first published in 1890.
Pigs are curious animals and are extraordinarily intelligent.
Pigs are extremely social animals, and love close contact and lying down together.
Pigs are very peaceful animals.
In the Chinese Zodiac, the Pig is seen to represent fortune, honesty and happiness.
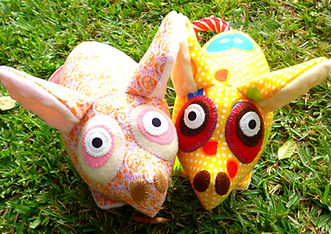
Oink Oink! Introducing 'Little Pig'. This little pig is not going to market, this little pig wants to come to your house to play.
Little Pig is a simple soft toy to make if you a beginner to soft toy making. Made from beautiful patchwork fabrics and super soft Minkiee Fabric you will not want to part with this cute.
If you haven't made one of my soft toys before, I suggest you read the following information in the link before you begin.
Requirements


Patchwork Cotton Farbic for the body, outer ears and outer area on the feet.
The Body: 50cm X 30cm (20 inches X 12 inches) This will be folded to get the two sides of the Body. The Ears: Two, 13cm X 12 cm (5 1/4 inches X 5 inches) The Feet: Four, 10cm X 9cm (4 inches X 3 1/2 inches
Minkiee Fabric for the inner ears and inner area of the feet. The Ears: Two, 13cm X 12 cm (5 1/4 inches X 5 inches) The Feet: Four, 10cm X 9cm (4 inches X 3 1/2 inches)
Optional: Quilters Muslin in cream or white for lining your soft toys. Click here on the link to see way I suggest- Lining your Toy. The amount required is exactly the same as the cotton and Minkiee Fabric measurements for the Body, Ears & Feet, just cut to the same sizes as given above.
Batting, the fluffy stuff that goes inside Quilts.
For the Ears: Four, 13cm X 12cm (5 1/4 inches X 5 inches)
For the Feet: Four, 10cm X 9cm (4 inches X 3 1/2 inches)
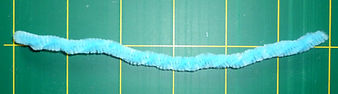
Small piece of Binding for the Tail, 9 inch length X roughly 1 inch wide. A Pipe Cleaner for the Tail.
For the Pig's Features
Fabric for the Pupil in the centre of each Eye. A white fabric with a black dot works well.
Pieces of Woolen-felt and/or Pure Woolen Blanketing Fabric. Use the Pattern Sheets as a guide for the amount required. The features on the Pattern Sheets are the actual size they will be on your Little Pig.
Colours- Two colours, for the two outer areas on the Eyes and a cream or white colour for the back of each Pupil. Brown for the nostrils on the Pig's snout.
DMC Embroidery Thread to match the colours of the felt or woolen fabric chosen for the feature pieces on the Pig. This will be used to blanket-stitch around each feature and to sew the feature into position on the Pig.
You will also need DMC Embroibery Thread for the Pig's Tail.
Fusable Webbing-Enough to make all the Pigs Features e.g. all pieces for the eyes, and the nostrils on the snout of the Pig. Please refer to Pattern Sheet to work out the exact amount required. The features on the Pattern Sheet are to scale.
Other Supplies
Lead Pencil, Tracing Paper or Baking Paper, Sewing Machine, Cotton (colour to match the colour of the fabric on the Pig's Body), Dress Making Scissors, Embroidery Needle and a Wooden Paint Brush for turning & stuffing.
Polyester Fill for stuffing the Pig. For information on what stuffing to use, please read the following link The 'Stuff' that Toys are made of!
.

Let's begin! Download and print off the Little Pig Pattern. Trace the pattern pieces onto tracing paper (baking paper works well also). Remember to mark all open-seams onto your traced pattern pieces.
Preparing the Body

1.
(Note: In this picture I have used my original design for my pattern, hence the pencil lines drawn on the pattern pieces.)
1. Trace the pattern pieces- The Pig's Body, Ear and Foot onto tracing paper. Mark all open-seams and the area where the tail will be inserted onto your traced body pattern. Cut-out the pattern pieces.

3a.

2.
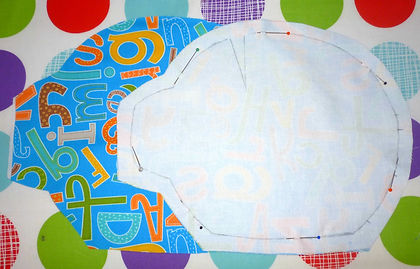
2. Take the piece of fabric for the body, (Optional- Place your lining piece of fabric on top of the reverse side of the backing fabric.) fold the fabric for the body right-sides together, so the reverse side of the fabic is facing towards you. Place the Body Pattern on top of the folded fabric.

3b.
3a. Place the Body pattern piece on top of the folded fabric. Pin the pattern to the fabric. Carefully trace around the pattern using a lead pencil, following the outside edge of the paper pattern. Mark all open-seams on the fabric and the area where the tail will be inserted. 3b. Remove the paper pattern, and cut out the body shape a good half an inch away from your drawn pencil line.
4a.
4a & 4b. Turn your paper body pattern over and trace the pattern onto the reverse side of fabric of the other fabric piece you just cut out for the pig's body.
If you are lining the the soft toy with an extra layer of fabric, pin the two pieces of fabric togther so they do not move.
5. On each Body piece is a V shape at the top. This will be where each Ear will be inserted and sewn. About 1/4 inch out from the point at the bottom of each V, mark a dot on the fabric body piece with your lead pencil.
Making the Ears

5.
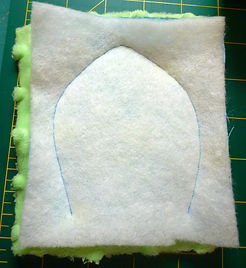
5. To make one pig's Ear, take a Cotton Fabric piece, a Minkiee Fabric piece and two pieces of Batting.

6a.

5.

4b.

6b.
6a. Place a piece of Batting on the reverse side of the Cotton Fabric and the Minkiee Fabric.
6b. Place the two pieces of fabric right-sides together and pin the pig's Ear Pattern to all the layers of fabric and batting.

7a.
7b.

8.
7a & 7b. Sew around the Ear Pattern on your sewing machine, following the outside edge of the paper pattern. Remember to use a small stitch on your sewing machine and a cotton thread which matches the colour of the fabric being sewn. For example if the fabric for your Pig is 'blue' use a 'blue' thread in your sewing machine.
8. Cut out the Ear 1/4 inch away from the seam just sewn.
9a.
9b.

10.
9a & 9b. Using your scissors make small snips around the seam of the ear. Be careful not to cut your sewn seam.
10. Cut away some of the excess fabric on the Ear's seam.


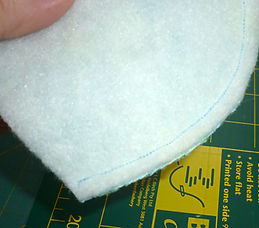
11. Turn the Ear to its right side and lightly press the cotton side of the Ear with an iron.
Now make the second Ear in exactly the same way as you did the first.
12. To make the Ears look more 'piggy like' we are going to turn the bottom of each Ear in slightly. Take an Ear and find the mid way point at the bottom with your finger.
11.
12.
13a &13b. Fold the top of the Ear down to the mid way point and pin. Sew the folded edge of the ear. Repeat on the same process on the second Ear.
13a.
13b.
Sewing the Pig's Ears to each Body Piece.
14.

15.
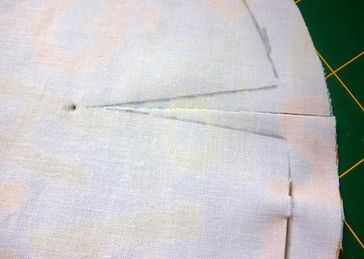
14. Take one of the body pieces and using your scissors, find the middle of the V and cut all the way down to the bottom of the V. Do not cut all the way down to the pencil drawn dot.
15. Take one of the Ears sewn earlier . Remember now, the the folded section of the Ear will be on top. Insert the Ear into the area just cut.


16a &16b. Pin the Ear to the Body piece of fabric. You will need to fold the Body fabric piece where you are pinning.
Make the line of pins which starts at the pencil drawn dot, and gradually goes all the way up to the outside edge of the fabric.
Do not pin on the pencil line at the V. Imagine a line which starts at the dot and goes all the way up to the outside edge 1/4 inch in from the drawn pencil line at the top. This pinned line is where we will sew.
16a.
16b.

17a.
17a & 17b. Using the sewing machine begin sewing the Ear to the Body starting at the dot. Slowly follow the line of pins removing them as your sew. Sew all the way up to the outside edge of the fabric.
Remember to use a small stitch on the sewing machine and a cotton thread which matches the colour of your fabric on the body. Sew the line sewn twice to make it strong.
18a. Trim the seam on the Ear to a neat 1/4 inch seam.
18b. Using your scissors make small snips along the 1/4 inch seam. Be careful not to cut your sewn seam.
18c. Using scissors cut away excess fabric.
19. Now attach the second Ear to the other Body piece in exactly the same way.
19.

17b.

18a.

18b.

18c.
Your Little Pig is almost hot to trot! Let's make some Feet.
20.
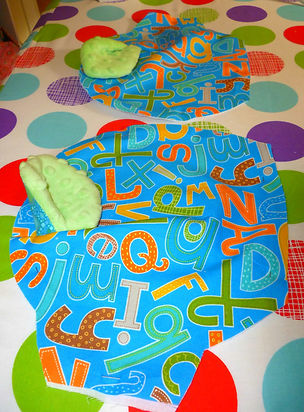
20. Take the four, Cotton pieces of Fabric and the four, Minkiee pieces of Fabric for your Pig's feet.
For each Pig's foot, match a cotton and Minkiee piece of fabric so that they lay right-sides together. As pictured in the image on the left.
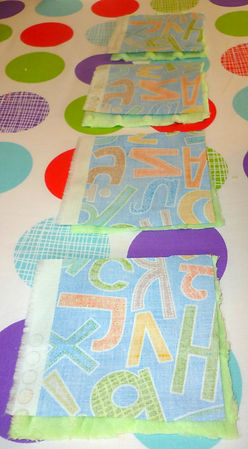
21. Take eight pieces of Batting. Lay a piece of Batting on the front and back of each group of fabric. As pictured in the image on the right.
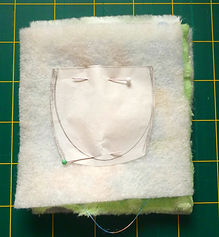
22a.

22b.

21.
22c.
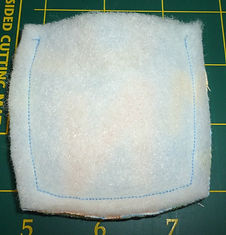
22a. Take one of the 'batting/fabric sandwiches' and pin the Foot Pattern to the layers. 22b.Sew around the foot on the sewing machine. 22c. Cut around the foot shape, 1/4 inch out from your sewing. Snip the seam around the sides of the foot and the bottom of the foot.
23.
23. Clip excess fabric around the outside of the Foot.
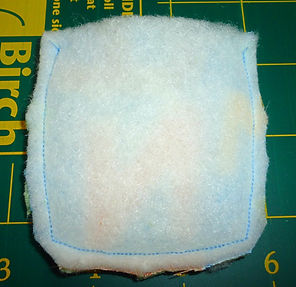
24 & 25. Turn the Foot to its right side.
Now make the other 3 feet in exactly the same way.
24.

25.
Making the Tail for the Piggy

26a.

26b.
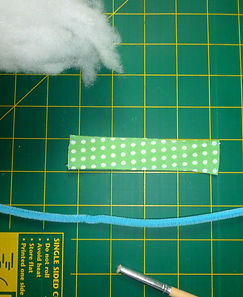
26a & 26b. Take your 9 inch long length of Binding and fold it together length wise, so that the right side of the Binding is showing. 26c. Pin and sew the two sides of the folded Binding together on the sewing machine. Remember to leave the open-seam at the top of the Binding open, as this is the opening which will allow you to stuff the tail

26c.
27a.

27b.
27c.
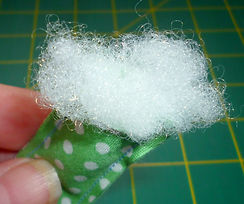
27a. Grab your Stuffing, Pipe Cleaner and Stuffing Stick. 27b. Fold the Pipe Cleaner in half. 27c. Twist the Pipe Cleaner around it's self.
28a.
28a. Push a small amount of Stuffing into the Tail piece, all the way to the end of the Tail. 28b. Place the twisted Pipe Cleaner into the Binding tube as far as it will go. 28c. Stuff filling around the inserted Pipe Cleaner, do not stuff the Tail piece too tightly as we want to be able to curl the Tail when your Piggy is finished.

28b.
28c.

29.
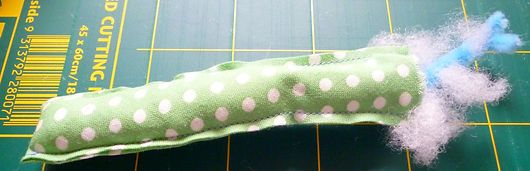
29. Your Piggy Tail should be able to curl a little.
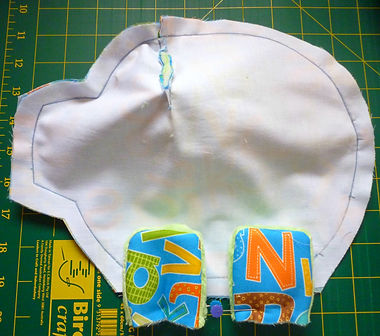
30. The two Body pieces, the four legs (pictured here pinned together) and the Tail.
Now you are ready to pin and sew your Pig together.
Sewing the Body Pieces
& Tail Together

30.
Before you begin sewing the pieces of you Pig together please consider using a small stitch on your sewing machine and sewing the areas twice. When you are sewing your toy on the sewing machine, you normally sew around your pattern once. I always sew around the pattern 'twice' and use a small stitch on the sewing machine.
Using a small stitch and sewing twice will make your toy alot stronger. Also, when it is stuffed firmly the seams will not be weak and will not be prone to ripping under pressure.

31a.
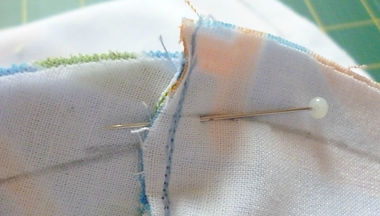
31a. Show the pins inserted on one side.
31. Take the two Body Pieces and placing them right-sides together on top of each other. Place a pin through the tip of the Pig's nose on one side of the Body piece and match it up in exactly the same place on the second Body piece, push the pin through the same area. Place a second pin through the two Body pieces in exactly the same way at the base of the nose.

31b.
31b. Shows the pins inserted through the same points on the second Body piece.

32.
33.
32. Gradually pin the two Body pieces together. When you get to the seam above the ears, make sure the two seams match up neatly with the seam on one side going in one direction, and the seam on the other Body piece going in the opposite direction. 33. Shows the two seams pinned together.

34.

35.
34. Poke the Pig's Tail inbetween the two Body pieces, where it is indicated and pin in position.
35. Shows the two Body pieces and with Tail on the inside pinned all around the outside of the Body. Note the open-seam at the bottom of the Pig's Body is pinned but is not going to be sewn yet.

36.

37.
36. Carefully sew around the Body using a small stitch on your sewing machine removing the pins as you go, sewing on the pencil line drawn on the Body piece. Do not sew over the open-seam on the Pig's bottom, we need to keep this area for turning.
37. Shows the Pig's Body sewn twice as recommended earlier. You want the seams to be strong, so they can handle all those cuddles your Little Pig is going to get!
Sewing the Feet to the Body of the Pig
38.
38. Pin the feet together so the Minkiee side of the feet is on the inside.
Trim the Body & Turn

40a.
39.
39. Place the feet inside the Body of the Pig and pin along the outside line on the Body. Sew the Feet into the Body on the sewing machine. You do have alot of layers of fabric to go through so take your time. Remember to sew this area twice.
40b.
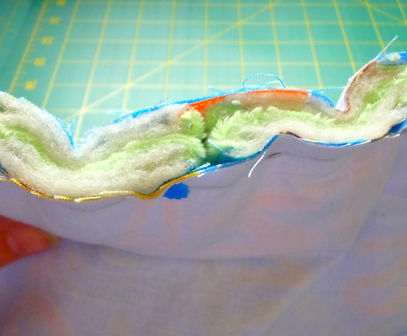
40a. Cut around the outside of the Pig's Body leaving a 1/4 inch seam and a little bit more at the open-seam on the Body.
40b. Snip the seam all the way around the Pig's Body, be careful not to cut your sewn seam.

41.
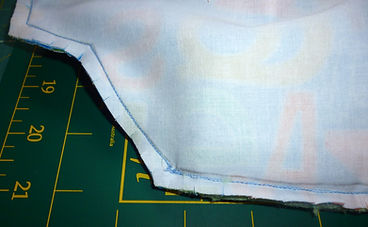
41. Cut away a bit more excess fabric around the outside of the Pig's Body. Not at the open-seam.

42.
42. Turn the Piggy to its right-side.

43. One Little 'flat' Pig done! You can lightly press the outside of the Pig's Body with the iron to get rid of any wrinkles. Now you are ready to give him a 'hairy' Tail and Stuff him.
43.
Making a Hairy Tail for your Pig
44. You will need your Embroidery Needle and DMC Thread for the Tail.

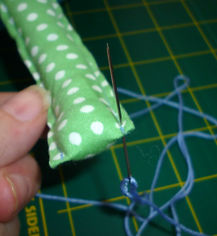

45a & 45b. Thread the needle with your DMC Thread. Starting at the egde of the Tail, simply take the needle up through the very egde of the tail and tie a knot.
44.
45a.
45b.

46.
46. Cotinue tying knots along the Pig's Tail.
47.
47. Trim the Tail Hairs to the desired length.
48.
48. Give the Tail a twist to get a curly Piggy Tail.
Stuffing the Little Pig
Please read the tutourial 'The Stuff that Toys are made of!' before you embark on stuffing the Pig. It has important information about what type of fill to use, useful tools to help you, stuffing and using a Ladder Stitch to sew up your soft toy.


49. You will need your stuffing (Polyester Fibre Fill) and your stuffing tool, as suggested in the tutorial a wooden paint brush with the bristles cut off work beautifuly.
50. Begin stuffing fill through the open-seam on the Pig's bottom. Push the fill up into the Piggy's nose. Stuff this area as much as possible, using the wooden brush to push and reach into areas you can't get to with your hand.
Once the nose has been sufficently stuffed, begin stuffing the body of the Pig. Use a combination of your hand and the wooden brush to stuff the Pig until he is about half filled.
This is the point were I like to begin sewing the open-seam closed.
49.
50.

51. Take your DMC Thread which is the same colour as the pig's body. Cut a length of thread and divide the strands, so you have 2 stands of cotton. Take your embroidery needle and thread the 2 stands together, through the head of the needle and tie a knot at the end.
In the tutorial The Stuff that Toys are made of!' I suggested you use a Ladder Stitch to sew up your open-seams on your Soft Toys.
At the end of the day, I want YOU to learn new skills and feel empowered to keep creating and making more things in the future. I want to make the steps to creating your soft toy as easy as possible and achievable for the 'beginners' out there!
So with this in mind, feel free to use a Ladder Stitch to sew up the open-seam. Or try this easier method to sew up the open-seam.
Begin where your sewn seam on the pig finished. Pull the needle through the inside to the outside edge of the fabric. Pull the two sides of the open-seam together with your fingers and take the needle up and over to the seam adjacent, pushing the tip of the needle through the edge of the fabric through to the fabric on the opposite side.
You are simply taking the needle up and over and through the 2 layers of fabric at the open-seam. Continue hand sewing along the seam in this manner making you stitches quite close to one another.
Sew only a little way then stop, take your needle through your last loop on your hand sewing to make a knot. Take the needle and thread out through anywhere on the body on the inside, and cut the thread.
51.


52a & 52b. Go back to stuffing the body some more, using your fingers and wooden paint brush to push the fill into the body.
Turn the Pig around and begin hand sewing the open-seam area opposite to the one sewn earlier. Sew a little way, stop and to back to stuffing again. You can continue this sew, stop and stuff method until you can fit no more in. Tie a knot in your last loop, then take your needle & thread down close to your last stitch, through the fabric into the inside of the body and out the side of the body. Cut off the thread close to the body and it will disappear inside the toy.
52a.
52b.
53. Congratulations, you now have one beautiful pig's bottom done!
53.

Congratulations the soft toy is finished! Now it is time to give your Toy a 'personality' with Freatures. Click on the following link to learn how to make and sew on the features for your toy.
For more detailed information with mini-slide step by step tutorials on how to use fusible webbing to create a woolen-felt shape and blanket stitch around the woolen-felt shape. How to layer and sew woolen-felt shapes together. How to use fusible webbing to back cotton fabric and glue it onto woolen-felt material, so that it can be used as a feature on a Soft Toy, and how to sew a blanket stitched woolen-felt shape onto a Soft Toy. Please click on the following link-
Sew Handmade
